


Ready to write Python code 4x faster?
This is post three in our series Python Basics, where we discuss the minimum Python and Jupyter you need to know to successfully automate Excel reports using Mito. Read Post One: Hello World and Post Two: Variables.
In the last post, we learned that variables are containers that hold values. Over the course of the program, the variable's value can change. We wrote the following code:

You might be wondering why using the variable is an improvement? Instead, we could have just created two print statements and saved ourselves two lines of code. But what would happen if instead of just printing the message, we wanted to do something more complicated? In that case, we'd have a ton of duplicated code. ... functions to the rescue!
Python functions are just like Excel formulas
To understand why functions are helpful in Python, let's first understand why formulas are helpful in Excel.
Excel formulas do a few things:
- They give us more advanced logic than we could easily express using simple operations like +, -, *, /.
- They make it easy to apply this advanced logic over and over again to different inputs. Often, we'll apply the logic to an entire column of cells!
As we'll see, functions in Python are the exact same thing – they make it easy to apply advanced logic multiple times throughout our code. Just like how formulas in Excel take input data, perform some operation, and return a result, functions in Python do the exact same thing.
Using functions in Python is a two step process.
- Create the function
- Use the function
In Excel, we skip straight to step 2 because the lovely people at Microsoft have implemented a ton of functions for us.
In the next couple of sections, we'll look at the steps of creating and using Python functions. Together, it'll look like this:
Creating functions
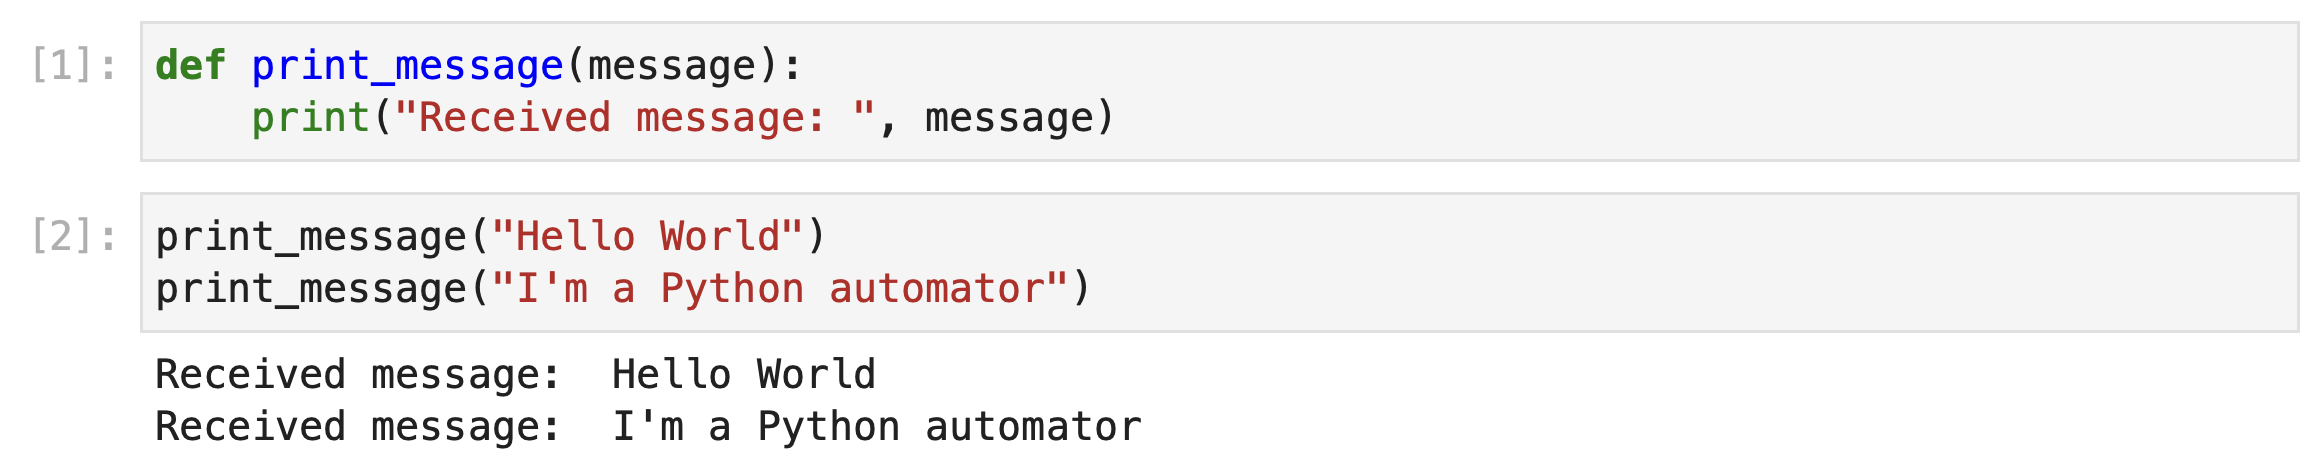
Let's create a function for printing out our message.
def print_message(message):
	print("Received message: ", message)
You can understand this code in the following way: We've created a function called print_message. Everytime it is used, it takes the provided message and prints the phrase "Received message: " followed by the message.
The function print_message has a few key components that are worth breaking down.
Define the function
In the code above, we use the word def, short for define, to tell Python this line of code creates a new function. def is followed by the name of the function so we can reference it later.
We end the line with : to tell Python that when the function is called, run the code that comes next.
Providing arguments to the function
We provide arguments to a function by passing them inbetween the opening and closing paranthesis in definition line of the function. In our print_message function, message is our only argument.
Arguments are variables that the function can use in its execution. You can think of Python arguments as the values you pass to a formula in Excel.
For example, Excel's mid formula takes three arguments – text, start_num, and num_chars.
Implementing the function
To implement a function, we write Python code underneath the function definition. This is the code that gets executed whenever the function is called.
So Python knows which code is part of the function, we indent the code one tab.
Using functions
Now that we've implemented the print_message function, its easy to use it in our code. Here are a few examples of using the print_message function that we just wrote:
# Passing a literal as the message argument
print_message("Hello World")

# Passing a variable as the message argument
message = "I am a programmer"
print_message(message)
As you can see, to use a function, just write the function name and pass the required parameters to the function.
When we execute the code print_message("Hello World"), Python looks for the function named print_message and fills in the arguments with the values passed to the function.
Originally, our function looked like:
def print_message(message):
	print("Received message: ", message)
But when we execute the code print_message("Hello World") we can think about running the following code. Notice that the message variable, is replaced with "Hello World".
def print_message("Hello World"):
	print("Received message: ", "Hello World")
A slightly more complicated function
Now that we understand all of the function basics, let's take a look at how we could implement and use the mid function in Python.
def mid(text, start_num, num_chars):

    starting_position = start_num - 1
    ending_position = starting_position + num_chars

    return text[starting_position : ending_position]
Once we've created the mid function in Python, notice how similar using it is to using the mid function in Excel.
In the next post in this series, we'll learn how the pandas python package lets us work with entire spreadsheets of data as a single variable.
More Like This
Automating Spreadsheets with Python 101
How to tell the difference between a good and bad Python automation target.
10 Mistakes To Look Out For When Transitioning from Excel To Python
10 Common Mistakes for new programmers transitioning from Excel to Python
Research shows Mito speeds up by 400%
We're always on the hunt for tools that improve our efficiency at work. Tools that let us accomplish more with less time, money, and resources.
3 Rules for Choosing Between SQL and Python
Analysts at the world's top banks are automating their manual Excel work so they can spend less time creating baseline reports, and more time building new analyses that push the company forward.